 NoiseGauge
How to calibrate your phone as a sound meter
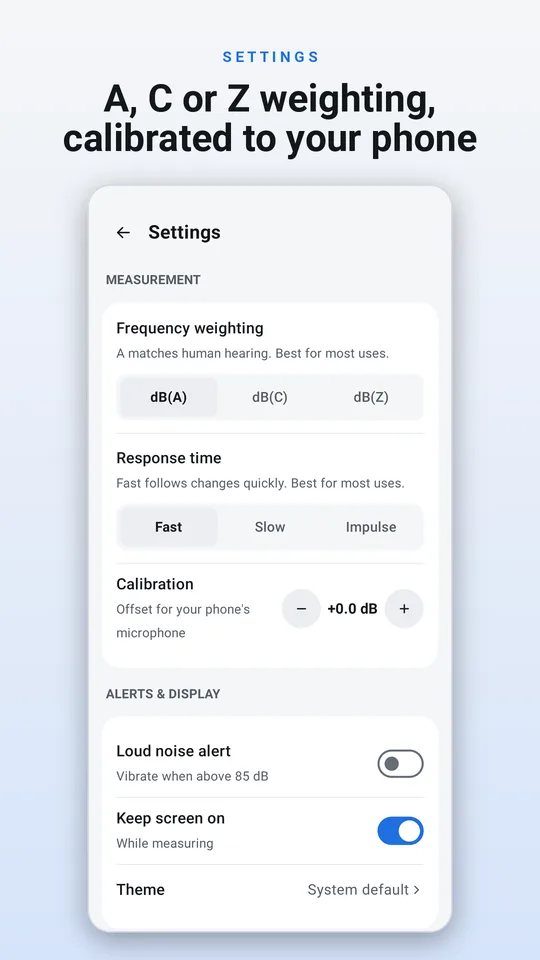
Put your phone next to a reference sound level meter, play a steady noise, read both in dB(A), and set your app's calibration offset to the difference. Check it at a second, louder level. Without a reference meter, leave the offset at zero: guessing from "a quiet room should be 30 dB" makes readings worse, not better.
Why phones read differently
- Microphones vary. Android requires a known sensitivity for the raw microphone input, but real phones still differ by a few decibels.
- Audio processing. Phones clean up sound for calls with automatic gain and noise suppression. A good meter app asks for the unprocessed input where the phone offers it, and the voice-recognition input otherwise, which has gain control off.
- Cases and position. A case over the microphone hole, or holding the phone with your hand over it, can easily cost several decibels.
- Loud sounds. Phone microphones are built for speech. Many compress or clip above about 100 dB, so readings there are often too low, and calibration can't fix that.
Calibrating against a reference meter
- Borrow or buy a meter you trust: a Class 1 or Class 2 meter is best. Schools, music shops, makerspaces and audio-engineer friends often have one.
- Use a steady, broadband sound: a fan, a running tap, or pink noise from a speaker. Avoid music and speech, which jump around.
- Aim for a moderate level, about 65–75 dB(A), well above the room's background and well below where phones struggle.
- Place both microphones side by side, the same distance from the source and pointing the same way. On most phones the microphone is a small hole on the bottom edge. Take the case off.
- Match settings: dB(A) and Slow response on both.
- Wait 10–20 seconds, then compare the averages, not a single moment.
- Set the offset to reference minus phone. If the meter shows 72.0 and the phone 69.5, set +2.5 dB.
- Check a second level, 10–15 dB louder or quieter. If both agree within about 1 dB, you're done. If not, use the offset that fits the level you measure most.
No reference meter?
- Leave the offset at zero and compare relative levels: before and after, room to room, night to night. The differences are reliable even when the absolute number is off by a couple of decibels.
- Don't calibrate against "known" levels from tables. A "60 dB conversation" can be anywhere from 55 to 70.
- Note in your diary or report that the phone wasn't calibrated.
External microphones
A USB or headset microphone has its own sensitivity, so calibrate it separately and keep a separate offset for each microphone. Measurement microphones with a USB interface can be checked with an acoustic calibrator (94 dB at 1 kHz) if you have one.
Phone microphones aren't certified sound level meters. Readings are estimates; see our terms.